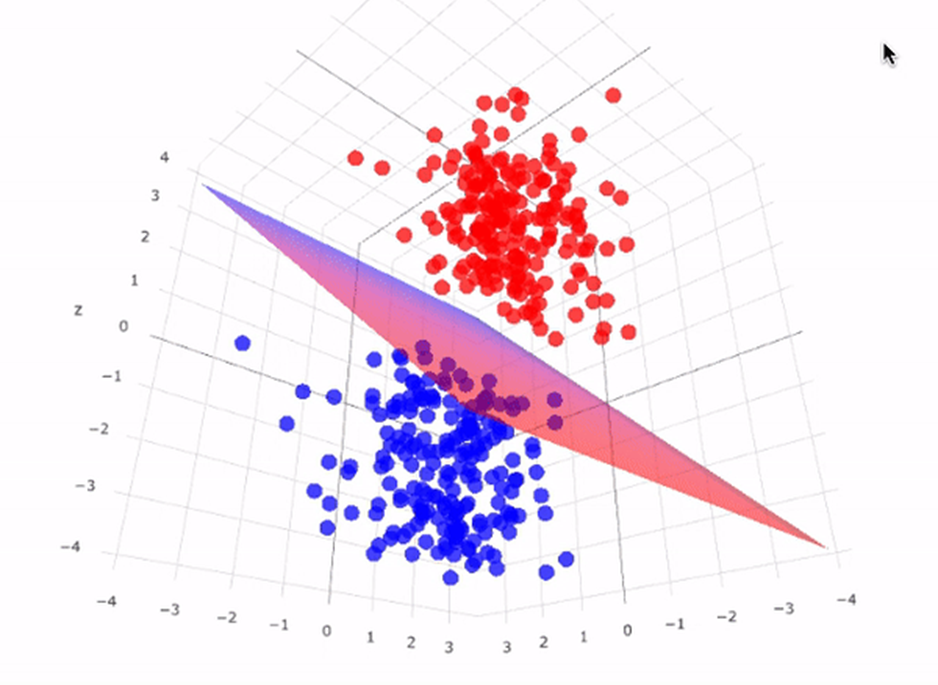
Support Vector Machine (SVM) is a powerful supervised learning algorithm used for classification tasks. It works by finding the hyperplane that best separates classes in feature space.
Let’s dive into the coding part of SVM
Dataset Link: https://drive.google.com/file/d/1G1QLiNndysY8kZDnqHQTiTpw6sqoDxbq/view?usp=sharing
Download the dataset from the above link
Importing Libraries:
import numpy as np
import matplotlib.pyplot as plt
import pandas as pd
Explanation:
numpy: For numerical operations.matplotlib.pyplot: For plotting graphs.pandas: For data manipulation and analysis.
Importing the Dataset:
dataset = pd.read_csv(‘Social_Network_Ads.csv’)
X = dataset.iloc[:, :-1].values
y = dataset.iloc[:, -1].values
Explanation:
pd.read_csv: Reads the dataset from a CSV file.iloc: Accesses subsets of the dataset.X: Contains the independent variables (features).y: Contains the dependent variable (target).
Splitting the Dataset:
from sklearn.model_selection import train_test_split
X_train, X_test, y_train, y_test = train_test_split(X, y, test_size=0.25, random_state=0)
Explanation:
train_test_split: Splits the dataset into training and testing sets.test_size=0.25: Specifies that 25% of the data will be used for testing.random_state=0: Sets the random seed for reproducibility.
Feature Scaling:
from sklearn.preprocessing import StandardScaler
sc = StandardScaler()
X_train = sc.fit_transform(X_train)
X_test = sc.transform(X_test)
Explanation:
StandardScaler: Scales features to have a mean of 0 and a standard deviation of 1.fit_transform: Computes the mean and standard deviation of training data and scales it.transform: Scales the testing data using the mean and standard deviation of the training data.
Training the SVM Model:
from sklearn.svm import SVC
classifier = SVC(kernel=’linear’, random_state=0)
classifier.fit(X_train, y_train)
Explanation:
SVC: Support Vector Classifier.kernel='linear': Specifies the linear kernel for linear separation.fit: Trains the SVM model on the training data.
Making Predictions:
y_pred = classifier.predict(X_test)
Explanation:
predict: Predicts the labels for the testing data using the trained model.
Evaluating the Model:
from sklearn.metrics import confusion_matrix, accuracy_score
cm = confusion_matrix(y_test, y_pred)
accuracy = accuracy_score(y_test, y_pred)
Explanation:
confusion_matrix: Calculates a confusion matrix to evaluate the performance of the model.accuracy_score: Calculates the accuracy of the model.
Visualizing the Results(Training Set):
# Visualizing the training set results
plt.scatter(X_train[y_train == 0, 0], X_train[y_train == 0, 1], color=’red’, label=’Class 0′)
plt.scatter(X_train[y_train == 1, 0], X_train[y_train == 1, 1], color=’blue’, label=’Class 1′)
plt.title(‘SVM (Training set)’)
plt.xlabel(‘Feature 1’)
plt.ylabel(‘Feature 2’)
plt.legend()
plt.show()

Explanation:
- Visualizes the training set with two features and two classes.
Visualizing the Results(Test set):
# Visualizing the test set results
plt.figure(figsize=(10, 6))
plt.scatter(X_test[y_test == 0, 0], X_test[y_test == 0, 1], color=’red’, label=’Class 0′)
plt.scatter(X_test[y_test == 1, 0], X_test[y_test == 1, 1], color=’blue’, label=’Class 1′)
plt.title(‘Test Set’)
plt.xlabel(‘Feature 1’)
plt.ylabel(‘Feature 2’)
plt.legend()
plt.grid(True)
plt.show()

In conclusion, the Support Vector Machine (SVM) is a powerful algorithm for classification tasks. It effectively handles high dimensional data and is versatile due to the different kernel functions that can be used. In this blog, we walked through the process of implementing SVM in Python, from data preprocessing to model evaluation. We also visualized the results to better understand the performance of our model. The key takeaway is that SVM, with its unique approach of finding the best hyperplane, is a valuable tool in a data scientist’s toolkit.

Leave a comment